DIY smart door operating robot – step 1 (push / pull door)
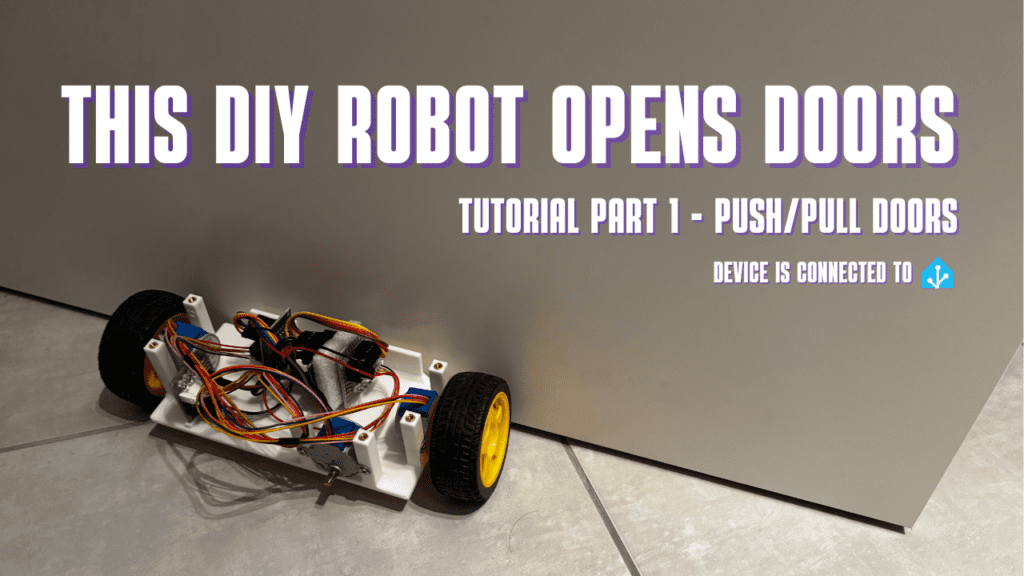
Have you ever wondered how you can open / close doors within your house automatically without having to permanently install an ugly rod opening solution at the top of the door? That’s what I am trying to build – a robot that can open / close doors automatically. And I want to take you with me on that journey. I will make a YouTube video series about this!
The first video can be found here – in the first video, we will make the robot capable of pushing and pulling the door:
The ESPHome YAML code as well as links to the STL files for 3D printing the housing can be found in this post.
ESPHome YAML code
esphome:
  name: door-operating-robot
  friendly_name: door_operating_robot
  on_boot:
    - text_sensor.template.publish:
          id: door_state
          state: "Door paused"
    - text_sensor.template.publish:
          id: handle_state
          state: "Handle paused"
  on_loop:
    then:
      - stepper.report_position:
          id: motor_right_wheel
          position: 0
      - stepper.report_position:
          id: motor_left_wheel
          position: 0
      - stepper.report_position:
          id: motor_door_handle
          position: 0

esp32:
  board: esp32dev
  framework:
    type: arduino

# Enable logging
logger:

# Enable Home Assistant API
api:
  encryption:
    key: YOUR_ENCRYPTION_KEY

ota:
  - platform: esphome
    password: YOUR_OTA_PASSWORD

wifi:
  ssid: !secret wifi_ssid
  password: !secret wifi_password

  # Enable fallback hotspot (captive portal) in case wifi connection fails
  ap:
    ssid: "Door-Operating-Robot"
    password: YOUR_AP_PASSWORD

captive_portal:

globals:
  - id: motor_left_running
    type: bool
    restore_value: no
    initial_value: 'false'
  - id: motor_right_running
    type: bool
    restore_value: no
    initial_value: 'false'
  - id: motor_handle_running
    type: bool
    restore_value: no
    initial_value: 'false'

stepper:
  - platform: uln2003
    id: motor_left_wheel
    pin_a: GPIO26
    pin_b: GPIO18
    pin_c: GPIO19
    pin_d: GPIO23
    max_speed: 500 steps/s
  - platform: uln2003
    id: motor_right_wheel
    pin_a: GPIO22
    pin_b: GPIO21
    pin_c: GPIO17
    pin_d: GPIO16
    max_speed: 500 steps/s
  - platform: uln2003
    id: motor_door_handle
    pin_a: GPIO27
    pin_b: GPIO25
    pin_c: GPIO32
    pin_d: GPIO4
    max_speed: 250 steps/s


button:
  - platform: template
    name: "Open door"
    on_press:
      - script.execute: start_motor_left_backward
      - script.execute: start_motor_right_backward
      - text_sensor.template.publish:
          id: door_state
          state: "Opening door"
  - platform: template
    name: "Close door"
    on_press:
      - script.execute: start_motor_left_forward
      - script.execute: start_motor_right_forward
      - text_sensor.template.publish:
          id: door_state
          state: "Closing door"
  - platform: template
    name: "Pause door"
    on_press:
      - script.execute: stop_motor_left
      - script.execute: stop_motor_right
      - text_sensor.template.publish:
          id: door_state
          state: "Door Paused"
  - platform: template
    name: "Unlock handle"
    on_press:
      - script.execute: start_motor_handle_forward
      - text_sensor.template.publish:
          id: handle_state
          state: "Unlocking handle"
  - platform: template
    name: "Release handle"
    on_press:
      - script.execute: start_motor_handle_backward
      - text_sensor.template.publish:
          id: handle_state
          state: "Releasing handle"
  - platform: template
    name: "Pause handle"
    on_press:
      - script.execute: stop_motor_handle
      - text_sensor.template.publish:
          id: handle_state
          state: "Handle paused"

text_sensor:
  - platform: template
    name: "Door state"
    id: door_state
  - platform: template
    name: "Handle state"
    id: handle_state

script:
  - id: start_motor_left_forward
    then:
      - lambda: 'id(motor_left_running) = true;'
      - stepper.set_target:
             id: motor_left_wheel
             target: -10
  - id: start_motor_left_backward
    then:
      - lambda: 'id(motor_left_running) = true;'
      - stepper.set_target:
             id: motor_left_wheel
             target: 10
  - id: stop_motor_left
    then:
      - lambda: 'id(motor_left_running) = false;'
      - stepper.set_target:
             id: motor_left_wheel
             target: 0

  - id: start_motor_right_forward
    then:
      - lambda: 'id(motor_right_running) = true;'
      - stepper.set_target:
             id: motor_right_wheel
             target: 10
  - id: start_motor_right_backward
    then:
      - lambda: 'id(motor_right_running) = true;'
      - stepper.set_target:
             id: motor_right_wheel
             target: -10
  - id: stop_motor_right
    then:
      - lambda: 'id(motor_right_running) = false;'
      - stepper.set_target:
             id: motor_right_wheel
             target: 0

  - id: start_motor_handle_forward
    then:
      - lambda: 'id(motor_left_running) = true;'
      - stepper.set_target:
             id: motor_door_handle
             target: -10
  - id: start_motor_handle_backward
    then:
      - lambda: 'id(motor_left_running) = true;'
      - stepper.set_target:
             id: motor_door_handle
             target: 10
  - id: stop_motor_handle
    then:
      - lambda: 'id(motor_left_running) = false;'
      - stepper.set_target:
             id: motor_door_handle
target: 0STL files for housing
The STL files for the housing can be found here:
https://www.printables.com/model/1029199-door-operating-robot-v1
🤖


Leave a Reply