IKEA is selling a quite cheap air quality sensor which is called VINDRIKTNING. It senses the particulate matter concentration in the air and displays the air quality via some LEDs which indicate whether the air quality is good (green), medium (yellow) or poor (red).
This device is by default not smart connected, so you can’t get the sensor readings into your smart home hub. In this tutorial we are going to use ESPhome to integrate the IKEA sensor with Home Assistant. But we will not only read out the particulate matter sensor but also the integrated light sensor (which is normally used to dim the LEDs) and we will add a CO2 and TVOC sensor to the device to make it sense even more air quality data.
I created a video tutorial which you can watch in the following. Below the video, you will find detailed instructions as well as the required YAML code snippets.
Required parts and tools
You will need the following parts and tools for this tutorial:
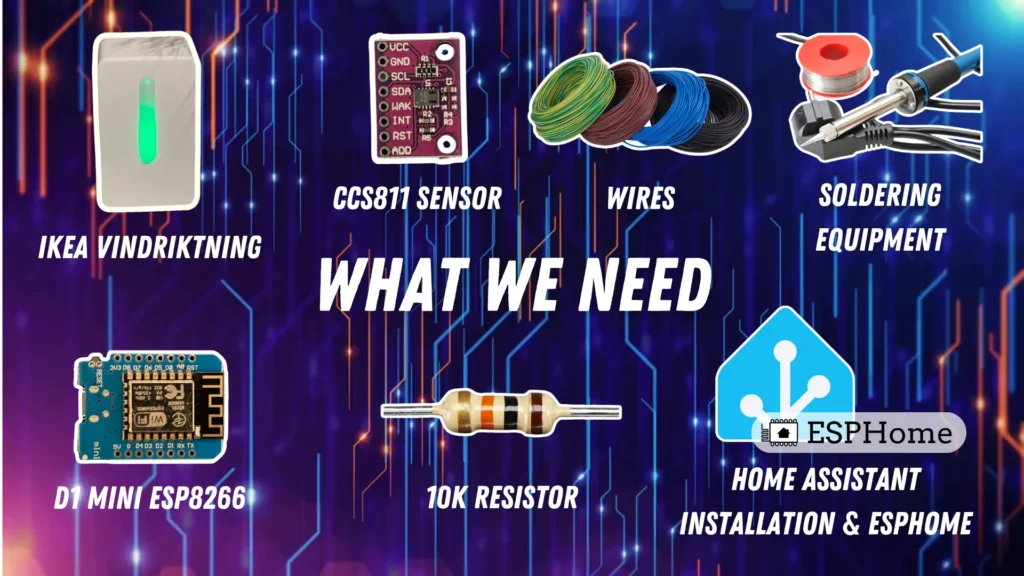
Step 1: Prepare D1 mini Device with ESPHome and auto discover in Home Assistant
First you have to initialize the D1 Mini with ESPHome. As there are already numerous tutorials out there, I don’t want to explain this in detail. See for example https://peyanski.com/complete-esphome-installation-guide/
Step 2: Open the IKEA Vindriktning housing
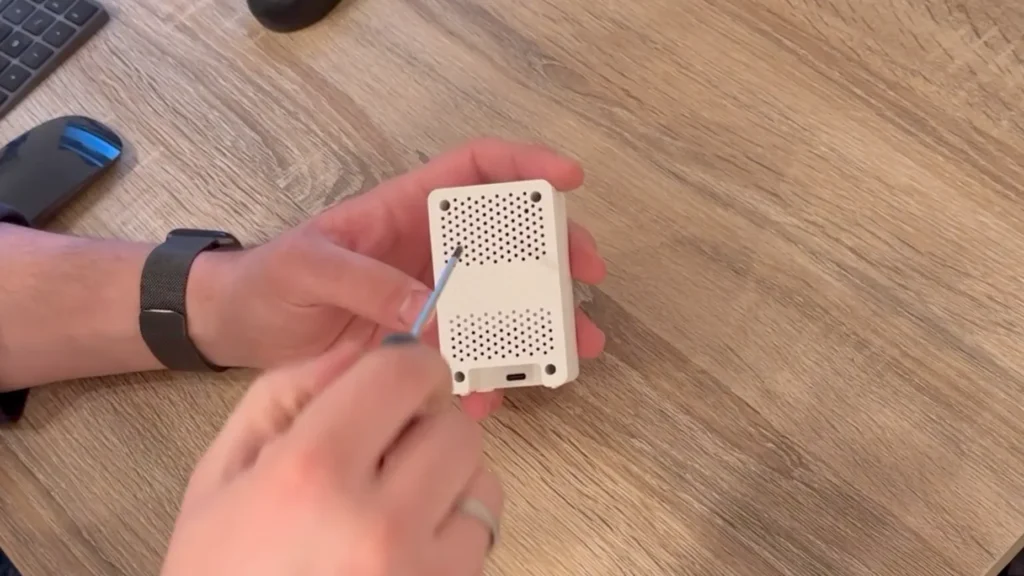
To open the Vindriktning housing, you just have to unscrew the four screws on the back of the device:
Step 3: Prepare wiring
Once the device is opened, we can start with the wiring. The following image illustrates the wiring scheme:
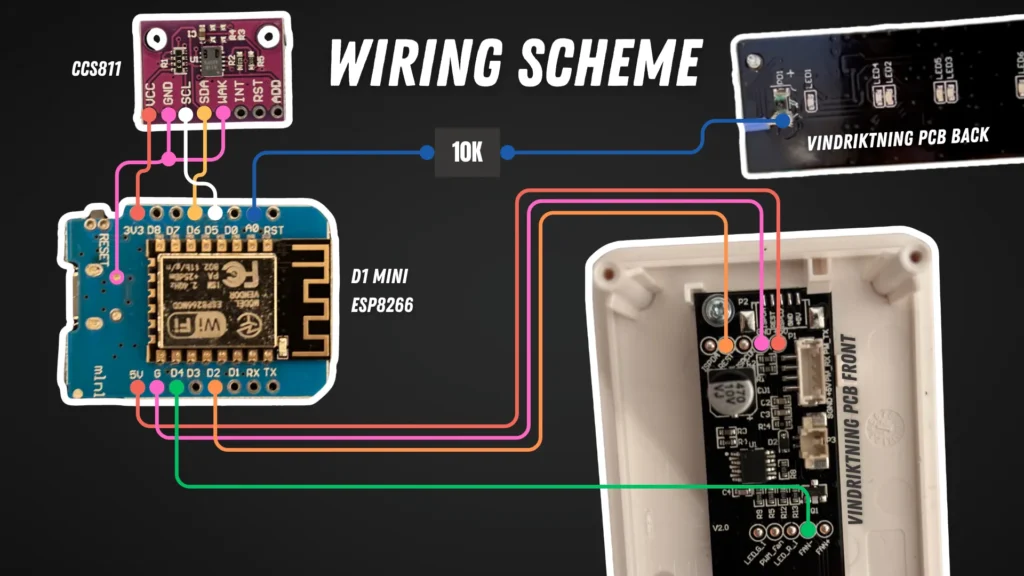
We have to solder some wires the the front part of the IKEA Vindriktning device:
- The orange wire goes to the pad REST and connects to the GPIO D2 of the D1mini (this is the UART interface of the Vindriktning device and allows to read out the particulate matter measurements send from the Vindriktning device)
- The pink wire goes to the pad GND and connects to the G input (“G” stands for ground) of the D1 mini (this will ground the D1 mini)
- The red wire goes to the pad +5V and connects to the 5V input of the D1 mini (this will power the D1 mini)
- The green wire goes to the pad “FAN-” and connects to the GPIO G4 of the D1 mini (this will give us the information whether the fan is running or not)
We also have to connect the light sensor on the back of the Vindriktning PCB:
- solder a blue wire to the left pad of the light sensor on the back part of the Vindriktning PCB
- connect it to a 10K resistor (needed to reduce the voltage — this resistor just slightly increases the voltage divider resistance on the analogue input). Could possible even be slightly higher resistor value.
- connect the other pin of the 10K resistor to the analog input A0 of the D1 mini
And lastly, we have to connect the CCS811 CO2 / TVOC sensor to the D1 mini:
- VCC goes to 3V3 on the D1 mini board
- GND and WAK need to be connected to one of the ground pins of the USB port of the D1 mini. You could also attach it to the G input but there is already an existing connection.
- SCL goes to GPIO D5 and SDA goes to GPIO D6 of the D1 mini
Step 4: Write ESPHome YAML code, compile and flash to D1 mini
After the D1 mini has been prepared for ESPHome and the wires have been connected, we can adapt the YAML code to introduce our new sensors. The following code snippet provides all the sensors needed.
esphome:
  name: "ikea-vindriktning"
  friendly_name: IKEA Vindriktning Air Quality Sensor

esp8266:
  board: d1_mini

# Enable logging
logger:

# Enable Home Assistant API
api:
  encryption:
    key: <YOUR_ENCRYPTION_KEY>

ota:
  password: <YOUR_OTA_PASSWORD>

wifi:
  ssid: !secret wifi_ssid
  password: !secret wifi_password

  # Enable fallback hotspot (captive portal) in case wifi connection fails
  ap:
    ssid: <YOUR_FALLBACK_HOTSPOT_SSID>
    password: <YOUR_HOTSPOT_FALLBACK_PASSWORD>

captive_portal:

uart:
  rx_pin: D2
  baud_rate: 9600

i2c:
  sda: D6
  scl: D5

binary_sensor:
  - platform: gpio
    name: "Fan running"
    id: fan_running
    pin:
      number: D4
      inverted: true

sensor:
  - platform: pm1006
    pm_2_5:
      name: "Particulate Matter 2.5µm Concentration"
  - platform: ccs811
    eco2:
      name: "eCO2"
    tvoc:
      name: "Total Volatile Organic Compound"
    address: 0x5A
    temperature: external_temperature
    humidity: external_humidity
    update_interval: 10s
    # baseline will be set after initial run with fresh air
    # baseline: 0x3CB8
  - platform: adc
    id: light_sensor
    name: "Light sensor"
    pin: A0
    update_interval: 1s
  - platform: homeassistant
    entity_id: <ENTITY_ID_HUMIDITY_SENSOR>
    id: external_humidity
    name: "external Humidity"
    force_update: true
  - platform: homeassistant
    entity_id: <ENTITY_ID_TEMPERATURE_SENSOR>
    id: external_temperature
    name: "external Temperature"
    force_update: true
<YOUR_ENCRYPTION_KEY>, <YOUR_OTA_PASSWORT>, <YOUR_FALLBACK_HOTSPOT_SSID> and <YOUR_FALLBACK_HOTSPOT_PASSWORD> are general ESPHome settings and will therefore not be explained here in detail.
The place holders <ENTITY_ID_HUMIDITY_SENSOR> and <ENTITY_ID_TEMPERATURE_SENSOR> are Home Assistant IDs for a humidity and temperature sensor which is required for correct calculation of the eCO2 and TVOC values. You could also attach a temperature and humidity sensor directly to the D1 mini as an alternative.
The attribute “baseline” of the ccs811 sensor is very important for calibrating the sensor. If you flash the D1 mini for the first time (after initial preparation), you should leave this attribute commented out as shown above. Then you have to put the sensor in a room full of clean fresh air or even outside of your window for about 20–30 min. It will then log the baseline value in the ESPHome logs:
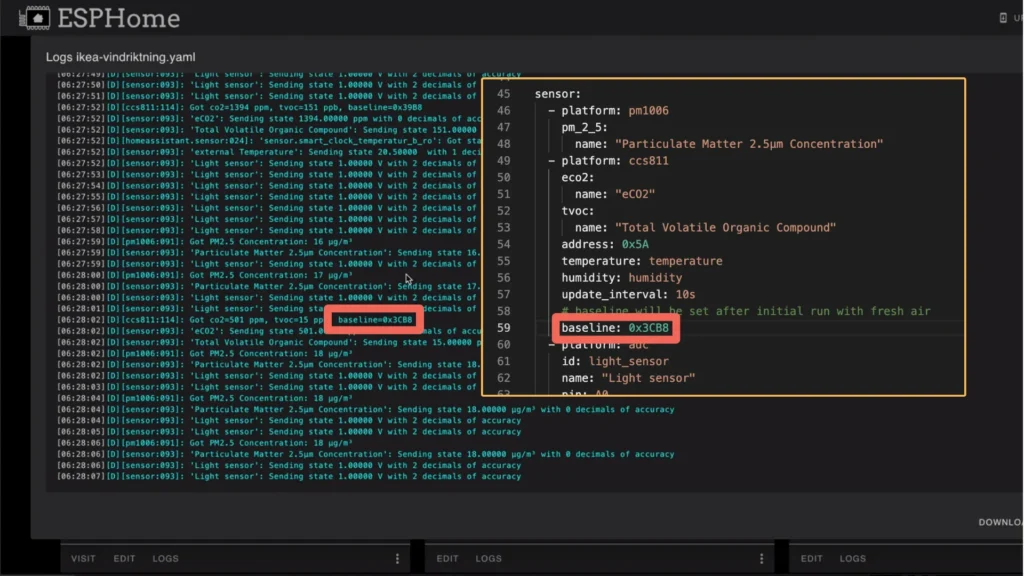
With that, you can now add the baseline value to your ESPHome YAML config and remove the # in front of the code line in order to uncomment. Then please flash it again to the D1 mini.
Step 5: Test our new air quality sensor
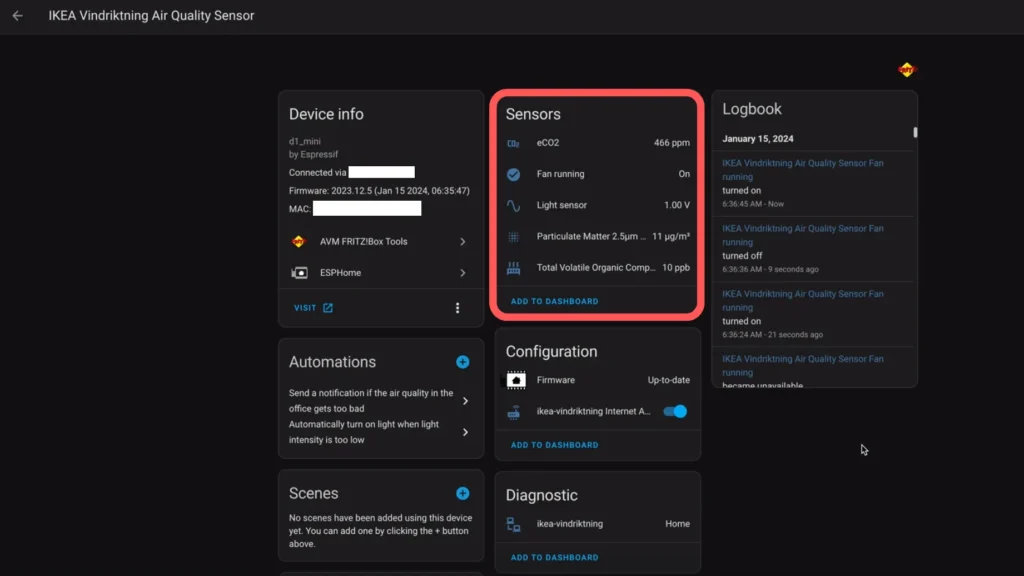
Everything is prepared. Before we put everything back together and close the housing, I would propose to test the device by connecting the sensor and the fan of the IKEA Vindriktning device to the IKEA Vindriktning PCB and power it via USB-C. You should now see values in Home Assistant:
Step 6: Put everything back together
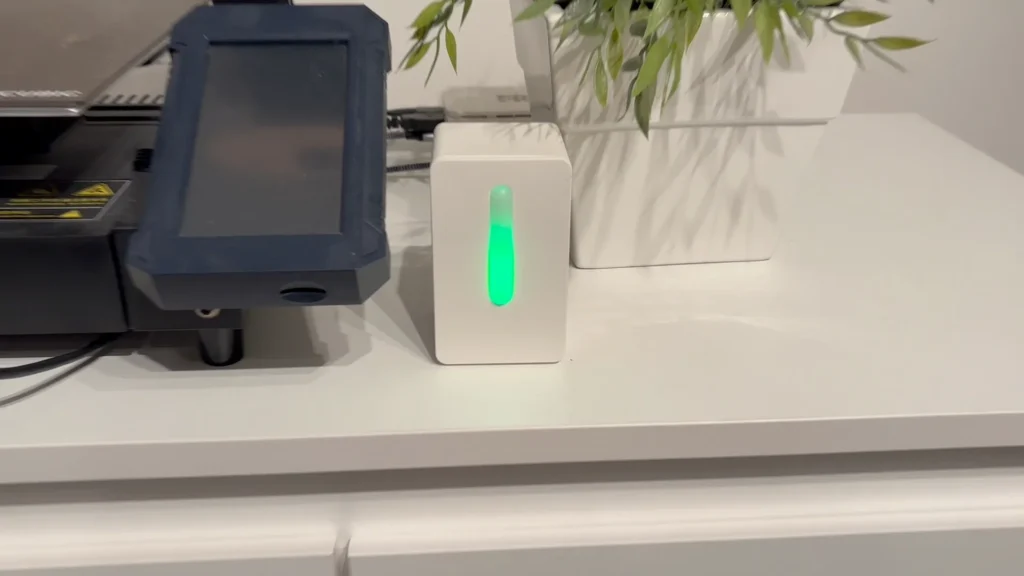
If everything works as expected, we can now put everything back together into the housing of the IKEA Vindriktning sensor. I would propose to glue the D1 mini and the CCS811 sensor into the housing with hot glue. Please make sure to leave enough space for air ventilation. Then close the housing with the four screws again. If you power your device via USB-C, the LEDs on the front should light up as usual and the device should continue to send data to Home Assistant.
Step 7: Create automations in Home Assistant
Automation 1: Automatically turn on light when light sensor detects darkness
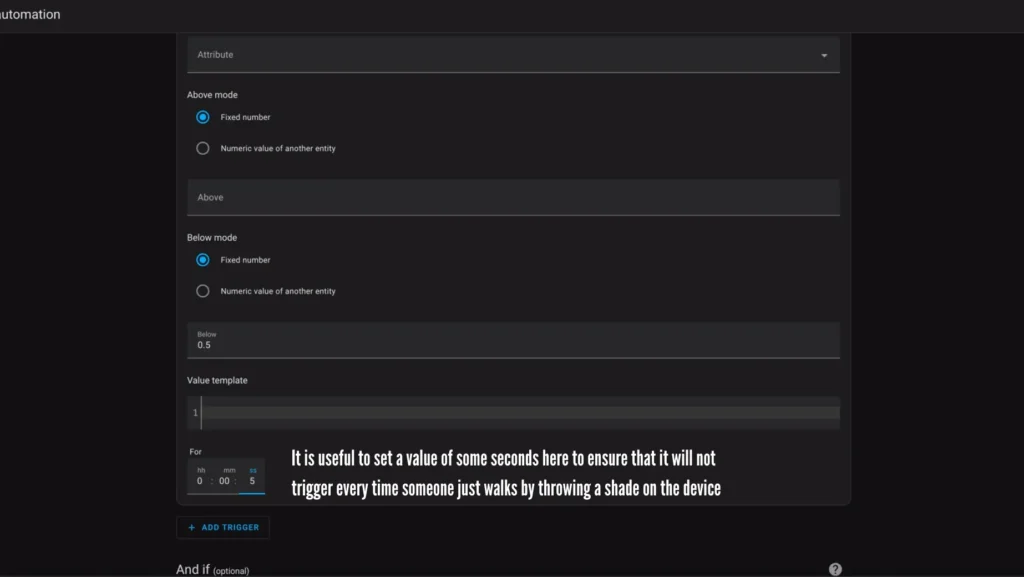
Our first automation will be triggered when the light sensor value falls below a certain threshold for some seconds. Let’s say it triggers if the value falls below 0.5V for more than 5 seconds (to ensure it was not just someone walking by throwing a shade onto the sensor):
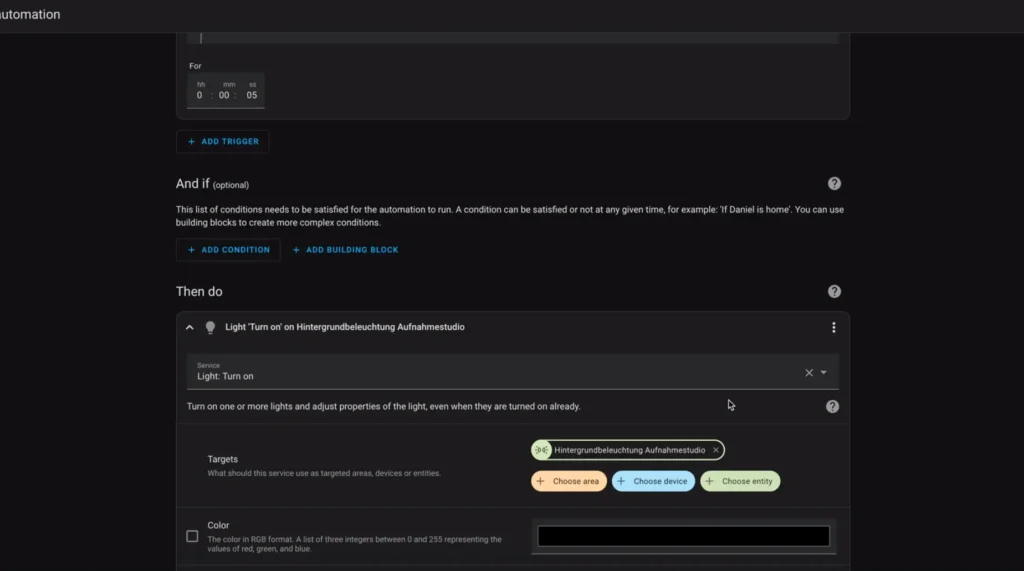
And as an action we want to turn on a light in that room, so we just select turn on light as the action and select a light entity to turn on:
Automation 2: Automatically send a push notification in case the air quality is bad
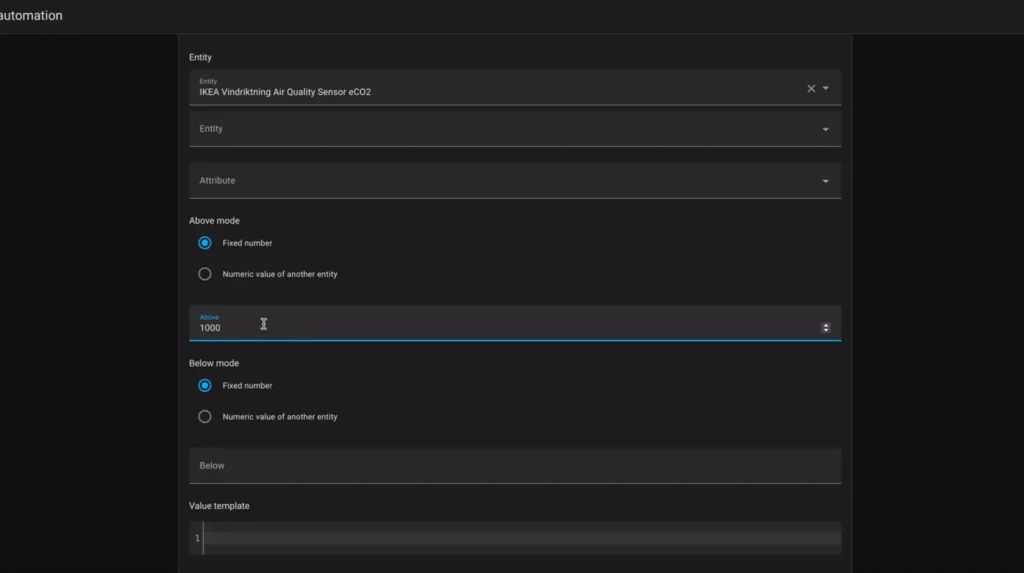
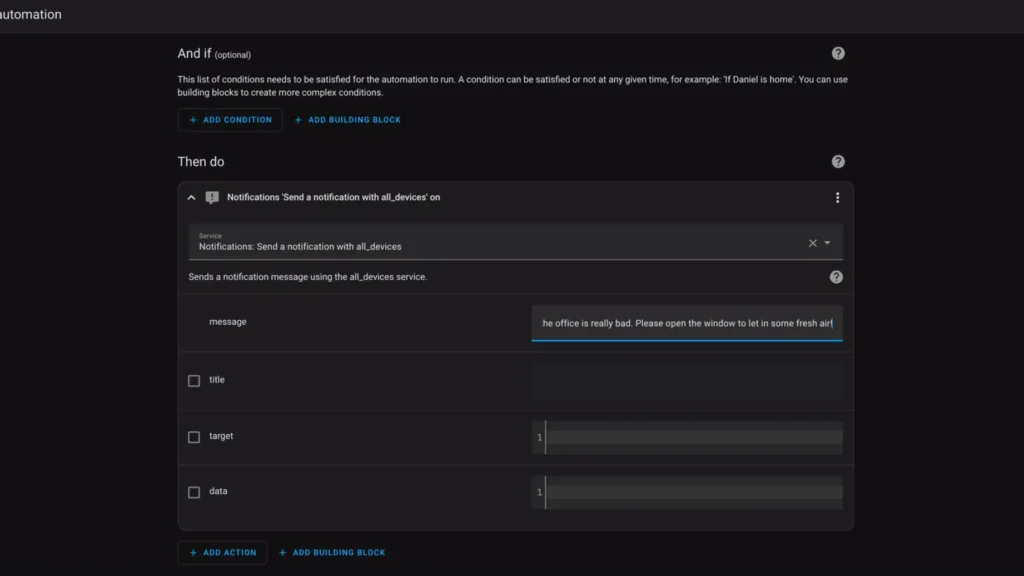
Our second automation will be triggered if the air quality is bad. We could for example take the CO2 sensor and when its value falls below a certain threshold (in this example 1,000), we will send a push notification to our smart phone to remind us of opening a window.
Of course we could also do the same thing for our particulate matter sensor.

No responses yet