Garden owners probably know the problem — you have set up a wonderful bed full of vegetables and/or fruits and a soon as the first fruits start growing, some uninvited visitors appear: SLUGS. They eat up everything or as least nibble on the fruits and everybody is annoyed of this.
There are numerous approaches how to deal with slugs reaching from waiting for them to show up and collecting them, building up fences, metallic bands or even electric wires which shall keep them away from the beds without killing them to slug pellets which are the last resort and will kill the slugs.
I for myself actually do not want to kill the slugs, I just want them to keep away from my vegetable bed but all the traditional methods for keeping them away did not really work. As I am a tinker and smart home maker, I thought there must be a solution that does not require killing them but uses technology to solve the problem. The idea of the slug detector was born!
How should it work? My idea was that whenever a slug shows up in my vegetable bed, a camera will detect it, take a picture of it and send the picture to my smart phone and the smart phone of my wife via a push notification. Then one of us can go outside to the garden and collect the slug to carry it away from our garden.
A rough explanation of how to build such a slug detector prototype will be explained in the following video, more details will be explained below.
Step 1 —Develop, train and test neural net for slug detection
The first step is to train and test the “heart” of the slug detector — a neural net which will detect slugs. I have linked a Jupyter notebook below which will explain in detail how to develop, train and test the neural net. Basically, I use an existing neural network architecture for object detection (which did not yet know slugs as objects) and just retrain the last layers in order to specialize the neural net to specifically detect slugs. I do not need to detect other things than slugs, therefore I can make a binary classificator out of it which just detects whether a slug is present in the image or not.
Step 2 — Set up TensorFlow serving on a local or cloud machine and deploy the model to server
TensorFlow serving provides a super easy and convenient way of serving a TensorFlow model via a REST web service by just deploying a docker container on a local machine or in the cloud. I will explain how to fire up a docker container locally in this tutorial.
Detailed instructions can be found here. But for a quick start, I executed the following lines in the terminal:
# pull docker image
docker pull tensorflow/serving

# download the repository
git clone https://github.com/tensorflow/serving

# Start TensorFlow Serving container and open the REST API port
docker run -t --rm -p 8501:8501 \
    --mount type=bind,source=<path_to_my_model>,target=/models/slug_detector \
    -e MODEL_NAME=slug_detector \
tensorflow/serving &As <path_to_my_model> you have to specify the path to your model on your local disc — this is the model you exported with the jupyter notebook in step 1. Once the docker container is up and running, you can run the first prediction!
# Query the model using the predict API
curl -d '{"instances": <your_image_as_numpy_array>}' \
-X POST http://localhost:8501/v1/models/slug_detector:predictAs <your_image_as_numpy_array> you need to input the image for which the neural net shall run a prediction as a numpy array. We will see in more detail how this works in step 5.
Step 3 — Drill whole in the bottom of the slug detector housing, mount stepper motor and attach shaft
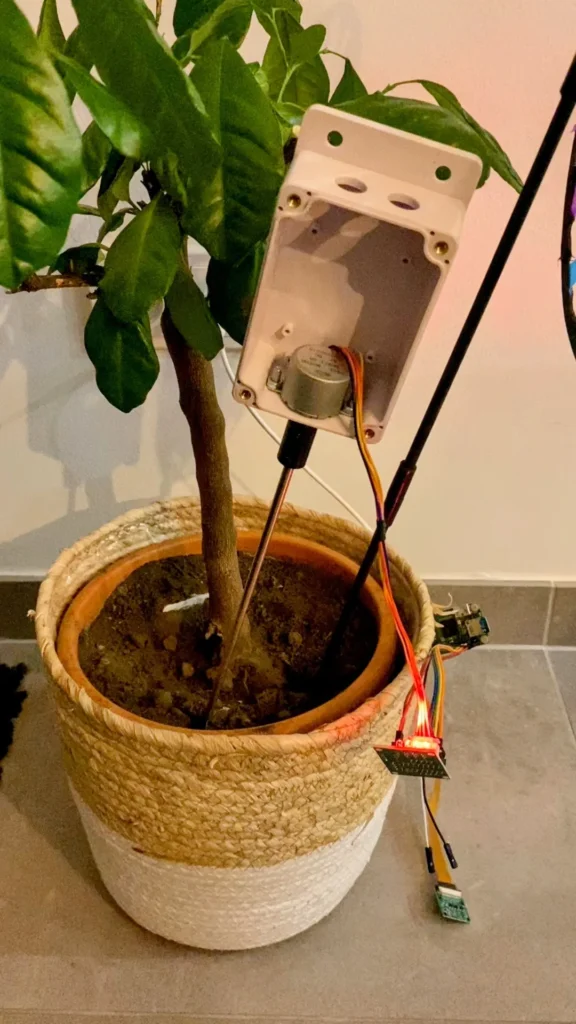
We want to equip our slug detector with a stepper motor that turns the device, hence also the camera, a certain angle so that we can cover a wider area of a vegetable bed in our garden.
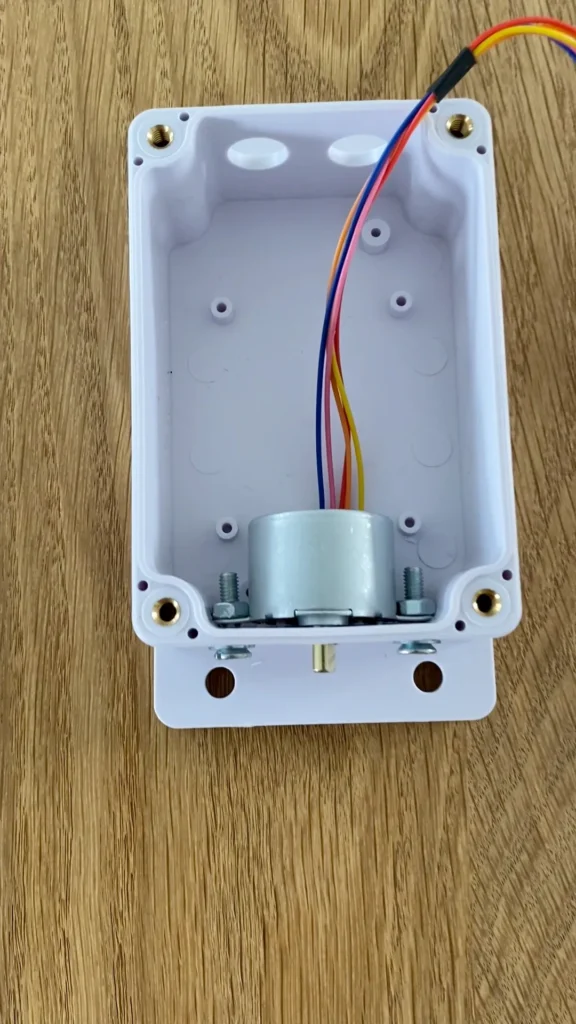
To do so, we attach a stepper motor to the bottom inside the housing, making sure that the shaft will face outside. To do so, we need to drill a whole large enough to let the shaft go through the housing:

Once this is done, we will mount a shaft extension with a shaft coupling to the motor shaft. With the shaft extension, we now have pike to push the slug detector into the soil. The slug detector itself will then turn if the stepper motor steps forward or backward.

Step 4 — Wire all the components
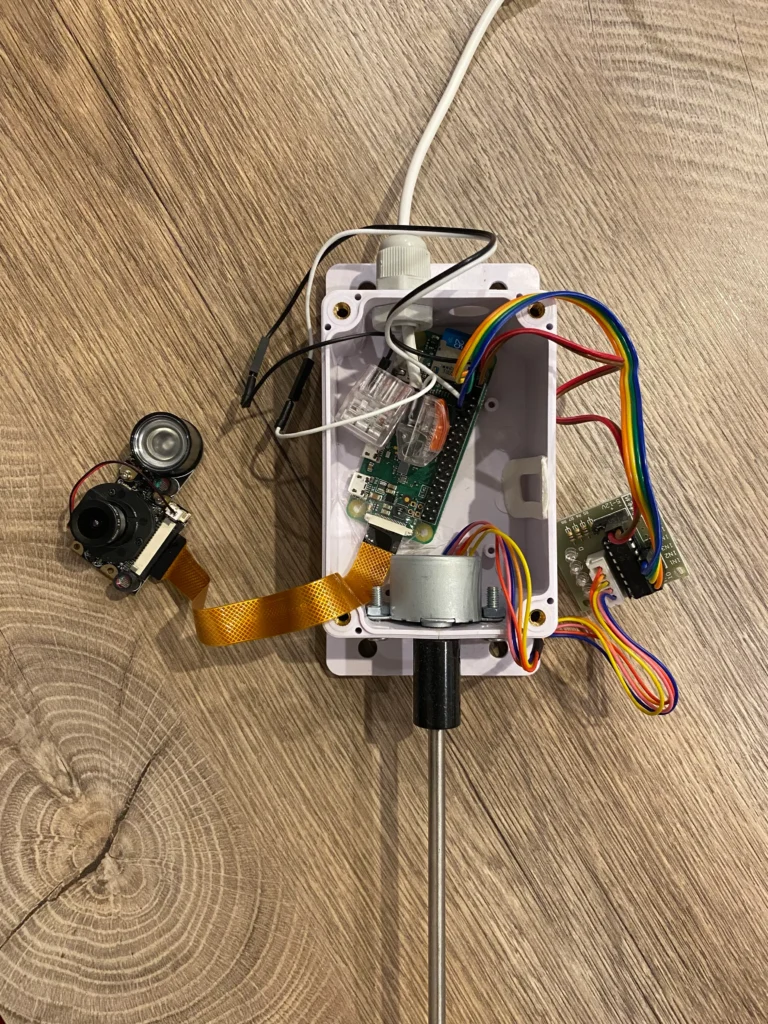
The following picture shows how I wired the components for the first prototype. I put the Raspberry Pi Zero W at the bottom of the housing and attached it with some double sided sticky tape. Then I plugged in the camera. From outside the housing, a USB cable comes in which provides the power supply for the Raspberry Pi and the whole system. The ULN2003 driver board is connected to the stepper motor. Also, the data pins of the ULN2003 are connected to some GPIOs of the Raspberry Pi and the power input to the ULN2003 board is supplied by the Raspberry Pi as well.

Step 5 — Install FTP Add-On in Home Assistant
In order to be able to upload slug images from the Raspberry Pi to your Home Assistant instance (to include the image in the push notification), you have to install the FTP Add-On in Home Assistant and configure and FTP user name and a password (you will need this in the python script created in step 6)
Step 6— Create Python script to operate slug detector
Now we have to create a Python script that will bring connect everything. It will drive the stepper motor left and right in small steps. At each step, it will take a picture with the camera. The picture will be sent to the TensorFlow serving REST API for inference. The neural network will calculate a prediction whether a slug is in the picture or not. If there is a slug in the picture, the picture will be uploaded to the Home Assistant instance via FTP and a Home Assistant webhook will be called to trigger an automation which will send the push notification to the user, see step 6.
An example Python script can be found here:
Step 7— Create Home Assistant automation to send push notification to smart phone in case slug has been detected
The last step is to create an automation in Home Assistant which will be triggered by the webhook call from the Python script running on the Raspberry Pi. This automation will send a push notification to the smartphones of my wife and me including the image that was uploaded to Home Assistant via FTP.
alias: Slug notification
description: ""
trigger:
  - platform: webhook
    webhook_id: <your_webhook_id>
    allowed_methods:
      - POST
      - PUT
    local_only: false
condition: []
action:
  - service: notify.all_devices
    data:
      message: >-
         A slug has been detected
         in your garden!
      title: Slug detected
      data:
        attachment:
          content-type: jpeg
          url: >-
            https://<your_hass_url>/local/{{trigger.json.filename}}
mode: singleAnd that’s it! I hope you enjoyed this tutorial and I am looking forward to getting to know how it worked out for you. Please comment!


No responses yet