Put any percentage in your house on your iPhone lock screen
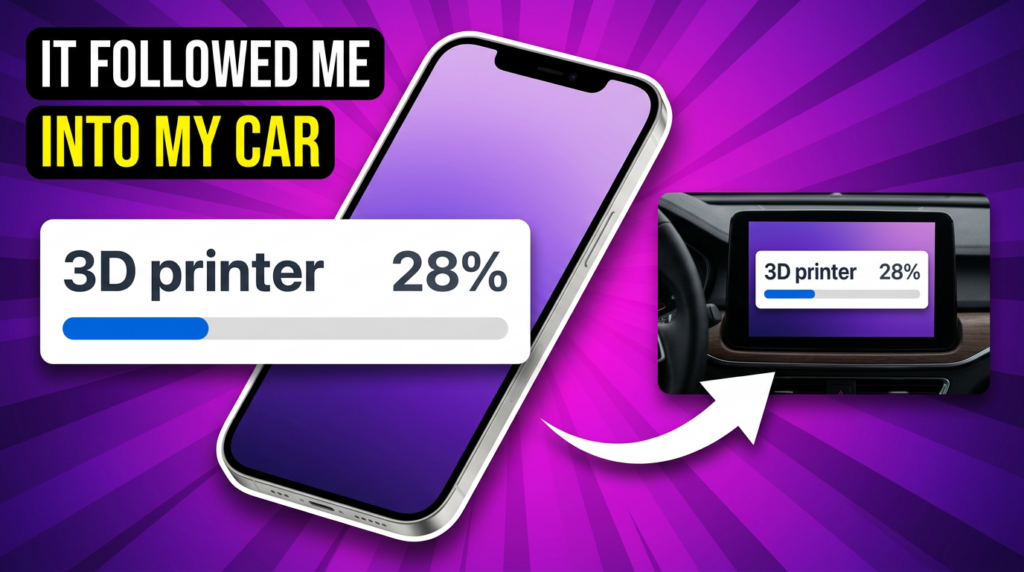
A few days ago I put my 3D printer’s progress on my iPhone lock screen. Then it showed up on my watch. And then, without me changing anything, it appeared in CarPlay while I was driving.
Someone in the comments asked how. So here it is, start to finish — and the part worth remembering is that this has nothing to do with 3D printers. It is an ordinary push notification with three extra fields. Which means it works for anything in your house that reports a percentage: the washing machine, the dishwasher, a battery, a download.
What you need first
- iOS 17.2 or later
- Home Assistant Core 2026.7 or later
- Home Assistant Companion app 2026.9 or later
- Your phone connected through the Companion app, so you have a notify service for it. Mine is
notify.mobile_app_your_iphone— yours will be named after your device. - Android 16 and later works too, with one difference: there a
titleis required. Leave it out and you get an ordinary notification, with no warning that anything went wrong.
If one of these is missing you do not get an error. You get a normal notification instead, and nothing tells you why. That is worth checking before you start hunting for a bug.
The one idea behind it
A Live Activity is not a separate feature you switch on. It is a notification that carries four extra fields:
live_update: true— the switch that turns an ordinary push into a live activitytag— required, and it matters more than it looks. The tag identifies this particular activity, and every update has to carry the same one. Get it wrong and iOS treats each message as new, so you end up with a stack of notifications instead of one bar that moves.progress— has to come from a sensor, not a fixed valueprogress_max— usually 100 if your sensor reports percent
There are more fields than these, by the way. You can show a live countdown instead of a bar, add a short status line, or set an icon and its colour. Same idea, different fields.
The automation
Copy this into a new automation, switch the editor to YAML mode, and replace the two sensor names and the notify service with your own.
alias: 3D printer progress on my lock screen
description: ""
mode: queued
max: 10
triggers:
  - trigger: state
    entity_id: sensor.printer_status
    id: status_change
  - trigger: state
    entity_id: sensor.printer_progress
    id: progress_change
conditions: []
actions:
  - choose:
      - conditions:
          - condition: trigger
            id: status_change
          - condition: state
            entity_id: sensor.printer_status
            state: running
        sequence:
          - action: notify.mobile_app_your_iphone
            data:
              title: 3D printer
              message: Print started
              data:
                tag: printer_live
                live_update: true
                progress: "{{ states('sensor.printer_progress') | int(0) }}"
                progress_max: 100
      - conditions:
          - condition: trigger
            id: progress_change
          - condition: state
            entity_id: sensor.printer_status
            state: running
        sequence:
          - action: notify.mobile_app_your_iphone
            data:
              title: 3D printer
              message: "Progress {{ states('sensor.printer_progress') }}%"
              data:
                tag: printer_live
                live_update: true
                progress: "{{ states('sensor.printer_progress') | int(0) }}"
                progress_max: 100
      - conditions:
          - condition: trigger
            id: status_change
          - condition: not
            conditions:
              - condition: state
                entity_id: sensor.printer_status
                state: running
        sequence:
          - action: notify.mobile_app_your_iphone
            data:
              message: clear_notification
              data:
                tag: printer_live
Why there are three cases
The choose block looks repetitive at first glance, but the three branches do different things — and all three are needed:
- Case one: the status changed and the printer is now running. This sends the first notification, and that is what creates the live activity.
- Case two: the progress changed while the printer is still running. Same notification again with the new number and the same tag, so iOS updates the existing bar instead of adding a new one.
- Case three: the status changed to anything that is not running. This sends
clear_notificationwith the same tag. This is the one people forget, and it is why a live activity sits on the lock screen for hours after the print is finished.
Two things that will save you an evening
Set mode to queued. The progress sensor can fire several times within a second. In the default mode Home Assistant simply drops those runs while one is still going, so your bar appears to freeze and you spend an hour looking for a bug that is not there.
iOS limits a live activity to about eight hours. So do not drive it from a timer that ticks on a fixed interval — let it react to actual state changes, the way it is built above. And if those eight hours run out in the middle of a long print, nothing breaks: the next progress update simply starts a fresh live activity, and it picks up at whatever percentage the printer is at right then.
If nothing shows up
Check the traces. They tell you whether the automation ran at all, which immediately splits the problem in half: either the trigger did not fire, or the notification did not arrive.
It works for anything with a percentage
The printer was just my example. The automation does not care what the number means. Anything in your house that reports a percentage can sit on your lock screen the same way — and once it is there, it follows you to your watch and into your car without any extra work.
What number in your house would you put on your lock screen? Tell me in the comments under the video.

Leave a Reply