From Boring to Brilliant: The Smart IKEA FADO Upgrade with ESPHome
Why settle for a boring, static light when you can have a smart home masterpiece that reacts to your touch? Today, I’m taking a generic glass sphere lamp and giving it a massive brain transplant.
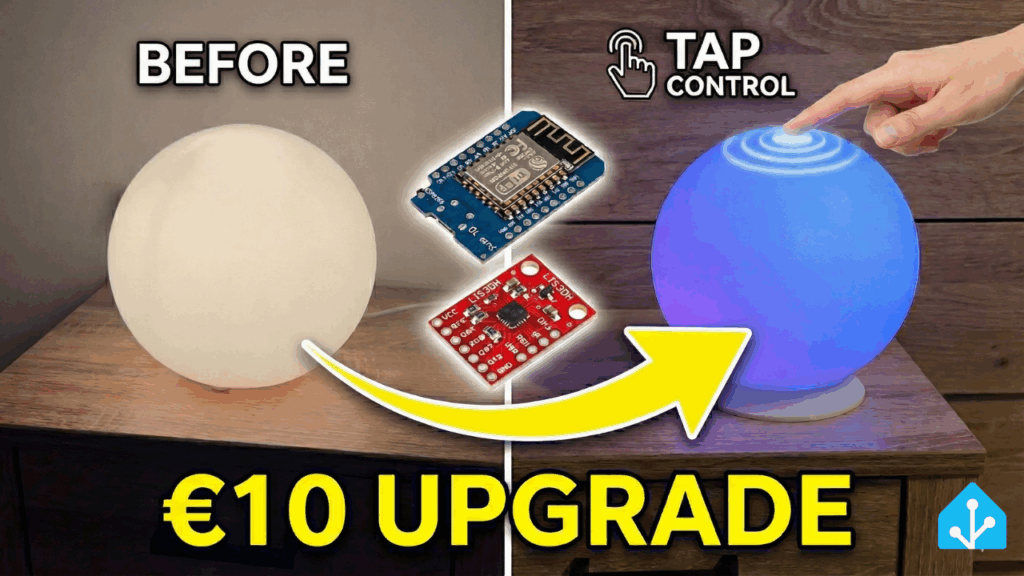
Using a D1 Mini (ESP8266), an LIS3DH accelerometer, and a custom 3D printed base, I’ve built a lamp that integrates perfectly into Home Assistant and—best of all—can be controlled simply by tapping or knocking on the glass.
Forget expensive smart lights; this is how you build your own!
📺 Watch the Full Build
See the tap control in action and follow the build step-by-step in my latest video:

💡 The Concept: “Kinetic” Smart Lighting
Most “touch” lamps use capacitive sensors, which require metal surfaces or conductive paint. Since this lamp is glass and plastic, I took a different approach. By using an LIS3DH accelerometer, the lamp detects the tiny vibrations caused when you tap the table or the sphere itself.
The brain of the operation is the D1 Mini (ESP8266). It reads the sensor data and runs ESPHome, allowing us to process those vibrations locally and trigger lighting effects instantly.
🛠️ Parts List
Here is exactly what I used to build this (Affiliate Links):
- The Lamp: A generic frosted glass sphere lamp (e.g., IKEA FADO or similar).
- Microcontroller: D1 Mini ESP8266
- Sensor: LIS3DH 3-axis Accelerometer (I2C) – you could also use another accelerometer
- LEDs: WS2812b LED Ring (12, 16 or 24 LEDs fit well)
- Power: USB cable and charger
- Optional: Photoresistor for room brightness detection
🖨️ The 3D Printed Base
The original base of the lamp was too small to hide the electronics cleanly. So, I fired up my 3D printer and designed a custom replacement base.
Here you can download the 3D files for the base:
https://www.printables.com/model/1521134-smart-ikea-fado-lamp
💻 The Software: ESPHome Magic
The real magic happens in the code. I am using ESPHome because it integrates nicely with Home Assistant.
Here is a snippet of the YAML configuration I used to detect the taps (and my custom light effects):
i2c:
id: bus_a
sda: D2
scl: D1
scan: true
globals:
- id: lis_addr
type: uint8_t
initial_value: '0x18'
esphome:
name: ${name}
friendly_name: ${friendly_name}
name_add_mac_suffix: false
on_boot:
priority: 200
then:
- delay: 300ms
- lambda: |-
auto* bus = id(bus_a);
uint8_t addr = id(lis_addr);
auto WR = [&](uint8_t reg, uint8_t val){ uint8_t d[2]={reg,val}; bus->write(addr,d,2); };
auto RD = [&](uint8_t reg){ bus->write(addr,®,1,false); uint8_t v=0; bus->read(addr,&v,1); return v; };
uint8_t who = RD(0x0F);
ESP_LOGI("lis3dh","WHO_AM_I = 0x%02X (expect 0x33)", who);
// 400 Hz, XYZ on
WR(0x20, 0x5F); // CTRL_REG1: ODR=400Hz, X/Y/Z enable
WR(0x21, 0x04); // CTRL_REG2: HPCLICK=1 (High-Pass only for tap)
(void) RD(0x26); // REFERENCE read, HPF reference
WR(0x23, 0x08); // CTRL_REG4: High-Resolution = 1 (finer detection)
WR(0x24, 0x00); // CTRL_REG5: LIR_CLICK=0 (no latch)
WR(0x38, 0x15); // CLICK_CFG: XS=1, YS=1, ZS=1 (all axes single-click)
WR(0x3A, 0x0C); // CLICK_THS: lower threshold -> more sensitive
WR(0x3B, 0x18); // TIME_LIMIT: slightly longer -> count softer taps
WR(0x3C, 0x30); // TIME_LATENCY: Dead time after tap (prevents double hits)
WR(0x3D, 0x00); // TIME_WINDOW: 0 (no double-tap)
// Route click to INT1/INT2 (in case your breakout has only one INT pin)
WR(0x22, 0x80); // CTRL_REG3: I1_CLICK
WR(0x25, 0x80); // CTRL_REG6: I2_CLICK
// Read status -> clear
uint8_t src0 = RD(0x39);
ESP_LOGI("lis3dh","CLICK_SRC (after init) = 0x%02X", src0);
- light.turn_on:
id: fado
brightness: 0.3
red: 1.0
green: 0.66
blue: 0.43
esp8266:
board: d1_mini
script:
- id: toggle_fado
then:
- light.toggle: fado
light:
- platform: neopixelbus
id: fado
name: "FADO"
pin: D4
num_leds: 16
type: GRB
variant: WS2812
method: ESP8266_UART1
default_transition_length: 300ms
gamma_correct: 2.2
effects:
# --- STANDARD EFFECTS ---
- pulse:
name: "Slow Pulse"
transition_length: 2s
update_interval: 2s
- addressable_rainbow:
name: "Rainbow Loop"
speed: 10
width: 16
- addressable_color_wipe:
name: "Color Wipe"
# --- CUSTOM LAMBDA EFFECTS ---
# 1. CANDLE FLICKER
- addressable_lambda:
name: "Candle Flicker"
update_interval: 16ms
lambda: |-
static int state = 0;
static int phase = 0;
int r = 255;
int g = 120;
int b = 0;
int flick = random(0, 80);
int intensity = 180 - flick;
for (int i = 0; i < it.size(); i++) {
it[i] = Color(r * intensity / 255, g * intensity / 255, b * intensity / 255);
}
# 2. POLICE LIGHTS / SIREN
- addressable_lambda:
name: "Police Lights"
update_interval: 100ms
lambda: |-
static int step = 0;
step++;
if (step >= it.size()) step = 0;
for (int i = 0; i < it.size(); i++) {
if ((i + step) % 16 < 8) {
it[i] = Color(255, 0, 0); // Red
} else {
it[i] = Color(0, 0, 255); // Blue
}
}
# 3. STAR SPARKLE / GLITTER
- addressable_lambda:
name: "Star Sparkle"
update_interval: 30ms
lambda: |-
// FIX: Use .get() to retrieve color, scale it, and write it back
for (int i = 0; i < it.size(); i++) {
Color c = it[i].get();
it[i] = c * 0.9f;
}
if (random(0, 10) < 3) {
int pos = random(0, it.size());
it[pos] = Color(255, 255, 255);
}
# 4. LAVA LAMP (PLASMA)
- addressable_lambda:
name: "Lava Lamp"
update_interval: 50ms
lambda: |-
static float phase = 0.0;
phase += 0.1;
if (phase > 2 * 3.14159) phase -= 2 * 3.14159;
for (int i = 0; i < it.size(); i++) {
float hue = phase + (float)i / it.size() * 3.14159;
int r = (sin(hue) + 1.0) * 127.5;
int g = (sin(hue + 2.094) + 1.0) * 127.5;
int b = (sin(hue + 4.188) + 1.0) * 127.5;
it[i] = Color(r, g, b);
}
interval:
- interval: 10ms
then:
- lambda: |-
static bool last_ia = false; // letzter IA-Status
static uint32_t last_tap_ms = 0; // Sperrzeit-Timer
const uint32_t REFRACTORY_MS = 400; // Sperrzeit nach Tap
auto* bus = id(bus_a);
uint8_t addr = id(lis_addr);
uint8_t reg = 0x39; // CLICK_SRC
bus->write(addr, ®, 1, false);
uint8_t src = 0; bus->read(addr, &src, 1);
bool ia = src & 0x40; // Interrupt Active
bool any_axis = src & 0x15; // XS|YS|ZS (irgendeine Achse Single)
uint32_t now = millis();
if (!last_ia && ia && any_axis && (now - last_tap_ms > REFRACTORY_MS)) {
last_tap_ms = now;
ESP_LOGI("lis3dh","Tap! CLICK_SRC=0x%02X", src);
id(toggle_fado).execute(); // sicheres Toggeln
}
last_ia = ia;
sensor:
- platform: adc
pin: A0
name: "Room brightness"
update_interval: 5s
filters:
- lambda: |-
return (1.0 - x) * 100;
unit_of_measurement: "%"🏠 Home Assistant Integration
Once flashed, the lamp is automatically discovered by Home Assistant. This means you can:
- Turn on/off the lamp
- Control the color and brightness from your dashboard.
- Use the room brightness sensor for automations
🎉 Conclusion
This 10€ upgrade completely changes the feel of the room. It’s a fun, interactive gadget that guests love to play with. If you have a 3D printer and a soldering iron, this is a must-do weekend project.
Have you built something similar? Let me know in the comments below!
Leave a Reply